 Save
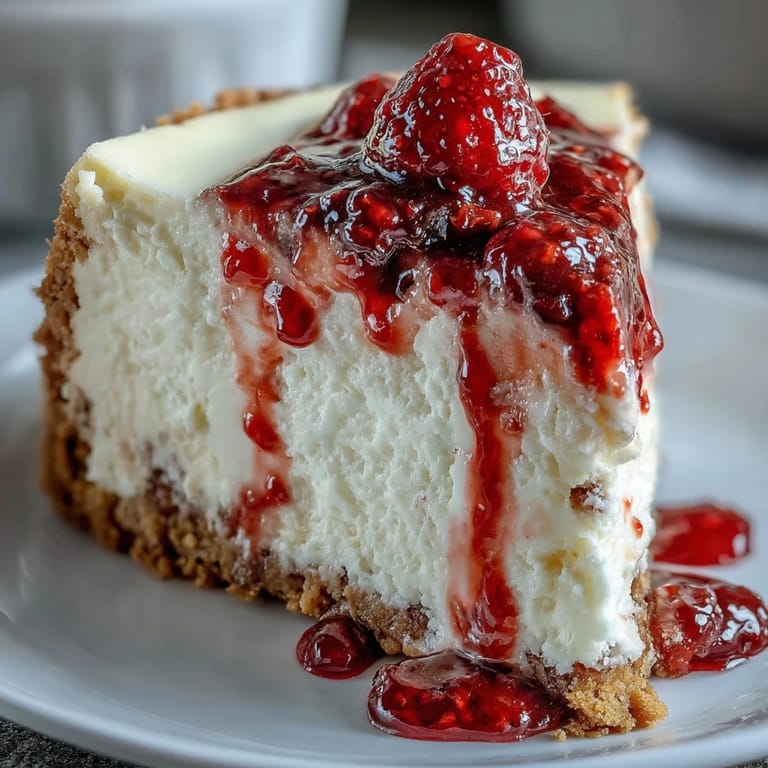
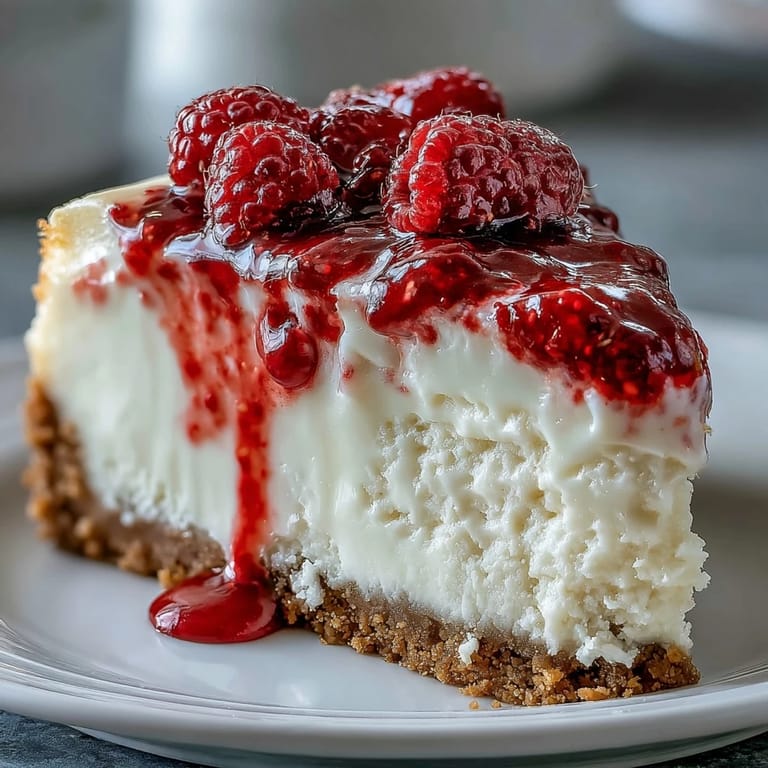
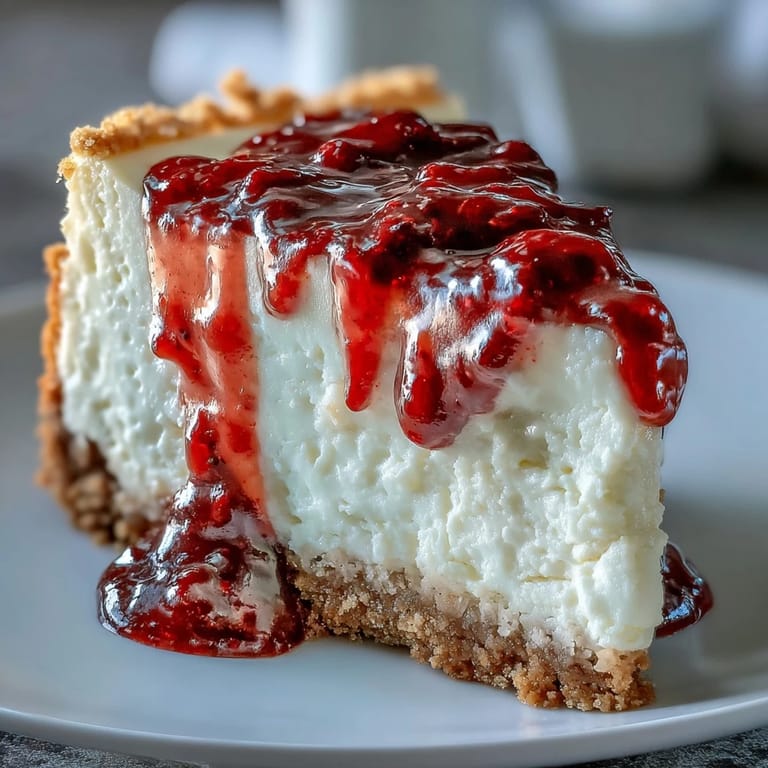
Save My oven timer went off at the exact moment my neighbor knocked on the door, asking if I was baking again. The smell of vanilla and melted white chocolate had drifted through the hallway, and she later admitted she timed her visit on purpose. That cheesecake, still warm and barely set, became the reason we started our monthly dessert swap. White chocolate and raspberry might sound fancy, but honestly, the combination just makes sense when you want something that feels celebratory without being fussy.
I brought this to a potluck once, still cold from the fridge, wrapped in a towel. Someone asked if I ordered it from a pastry shop, and I just smiled and said I got lucky. The truth is, the water bath did most of the work, keeping everything creamy and crack free. By the end of the night, three people had texted asking for the recipe, and I realized this cheesecake had become my quiet showstopper.
Ingredients
- Graham cracker crumbs: The base of any great cheesecake, buttery and sweet enough to balance the tangy filling without fighting for attention.
- Granulated sugar: Used in the crust, raspberry sauce, and batter to build layers of sweetness that complement rather than overwhelm.
- Melted butter: Binds the crust together and adds richness, so press it firmly or it will crumble when you slice.
- Fresh or frozen raspberries: Tart and vibrant, they cut through the richness of white chocolate and cream cheese beautifully.
- Lemon juice: Brightens the raspberry sauce and keeps it from tasting flat or one dimensional.
- White chocolate: Choose quality chips or bars, melted slowly so they stay smooth and glossy without seizing up.
- Cream cheese: Softened to room temperature, this is non negotiable for a lump free batter that blends like silk.
- Eggs: Add structure and creaminess, but mix them gently to avoid incorporating too much air.
- Vanilla extract: A warm backdrop that ties the white chocolate and cream cheese together without stealing the spotlight.
- Sour cream: Adds tang and keeps the texture luxurious, even after hours in the fridge.
- Heavy cream: Thins the batter just enough to make it pourable and swirl friendly.
Tired of Takeout? 🥡
Get 10 meals you can make faster than delivery arrives. Seriously.
One email. No spam. Unsubscribe anytime.
Instructions
- Prep the Pan:
- Preheat your oven to 325 degrees F and grease a 9 inch springform pan, then line the base with parchment paper. This step prevents sticking and makes releasing the cheesecake so much easier later.
- Build the Crust:
- Mix graham cracker crumbs, 1/4 cup sugar, and melted butter until it feels like wet sand, then press it firmly into the bottom of the pan. Bake for 8 minutes, then let it cool completely so the filling does not melt into it.
- Make the Raspberry Sauce:
- Combine raspberries, 2 tablespoons sugar, and lemon juice in a small saucepan and cook over medium heat for 5 to 7 minutes, stirring often until thickened. Strain out the seeds if you prefer a smoother swirl, then set aside to cool.
- Melt the White Chocolate:
- Use a double boiler or microwave in 20 second bursts, stirring between each interval until the chocolate is smooth and glossy. Let it cool slightly so it does not scramble the eggs when you add it to the batter.
- Prepare the Batter:
- Beat cream cheese and 1 cup sugar until smooth and creamy, then add eggs one at a time, beating just until combined. Mix in vanilla extract, sour cream, and heavy cream until smooth, then gently fold in the melted white chocolate.
- Layer and Swirl:
- Pour half of the cheesecake batter over the cooled crust, dollop half of the raspberry sauce on top, and swirl gently with a knife. Pour the remaining batter on top, add more raspberry sauce, and swirl again for a marbled effect.
- Prepare the Water Bath:
- Wrap the outside of the springform pan in two layers of foil to prevent leaks, then place the pan in a larger roasting pan. Pour in hot water to reach halfway up the sides of the springform pan.
- Bake:
- Bake for 60 to 70 minutes, until the edges are set and the center is slightly wobbly. The cheesecake will continue to set as it cools, so resist the urge to overbake.
- Cool Slowly:
- Turn off the oven, crack the oven door, and let the cheesecake cool inside for 1 hour. Remove from the water bath, then refrigerate for at least 4 hours or overnight.
- Serve:
- Remove from the pan, top with extra raspberry sauce or fresh berries, then slice and enjoy. Dip your knife in hot water and wipe between cuts for clean, bakery style slices.
 Save
Save One evening, I served this cheesecake after a long dinner with friends, and the table went quiet for a moment. Someone finally said it tasted like a celebration, even though it was just a regular Thursday. That is when I realized dessert does not need a reason, it just needs to be worth the wait.
Choosing Your White Chocolate
Not all white chocolate is created equal, and the cheap stuff can taste waxy or overly sweet. Look for bars or chips that list cocoa butter as the first ingredient, not vegetable oil. I learned this after a batch turned grainy and refused to melt smoothly, and now I always spend a little extra on quality chocolate. It makes a noticeable difference in both flavor and texture, turning the cheesecake from good to genuinely memorable.
Getting the Swirl Just Right
The first time I swirled the raspberry sauce, I overdid it and ended up with a muddy pink mess instead of defined ribbons. Now I use a butter knife and drag it through the batter in long, gentle S shapes, lifting the knife out between strokes. Less is more here, you want distinct pockets of red against the creamy white, not a uniformly blended color. If you are nervous, practice on a plate with jam and yogurt before committing to the real thing.
Storing and Serving
This cheesecake keeps beautifully in the fridge for up to five days, covered loosely with plastic wrap or foil. The flavors actually deepen after a day or two, as the white chocolate and raspberry meld together. If you are serving it for a party, let it sit at room temperature for about 15 minutes before slicing so the texture softens just slightly.
- Run your knife under hot water before each slice for clean, professional looking cuts.
- Leftover raspberry sauce can be drizzled over individual slices or stirred into yogurt the next morning.
- If you are feeling fancy, garnish with fresh raspberries and a dusting of powdered sugar right before serving.
 Save
Save Every time I pull this cheesecake from the fridge, I remember that baking does not have to be perfect to be worth it. It just has to taste like you cared enough to try.
Recipe FAQs
- → How long should I chill the cheesecake before serving?
Refrigerate for at least 4 hours, but overnight is ideal for the best texture and flavor. This allows the cheesecake to set completely and the flavors to meld together beautifully.
- → Can I use frozen raspberries instead of fresh?
Yes, frozen raspberries work perfectly for the sauce. You may need to adjust the sugar slightly depending on their natural sweetness. Thaw them slightly before cooking for more even heating.
- → Why do I need a water bath when baking?
The water bath (bain-marie) provides gentle, even heat that prevents the cheesecake from cracking and ensures a silky smooth texture throughout. It also protects the delicate custard from cooking too quickly on the edges.
- → How do I know when the cheesecake is done baking?
The edges should be set and slightly puffy, while the center will still have a gentle wobble like Jell-O. It will continue cooking as it cools in the oven, so removing it at this stage prevents overbaking.
- → Can I make this cheesecake ahead of time?
Absolutely! In fact, cheesecakes taste better when made a day ahead. The flavors develop and the texture becomes creamier after resting in the refrigerator overnight. Store it covered in the springform pan for up to 3 days.
- → What's the best way to get clean slices?
Dip your knife in hot water and wipe it clean between each slice. This prevents the creamy filling from sticking to the blade and gives you pristine, restaurant-quality portions.