 Save
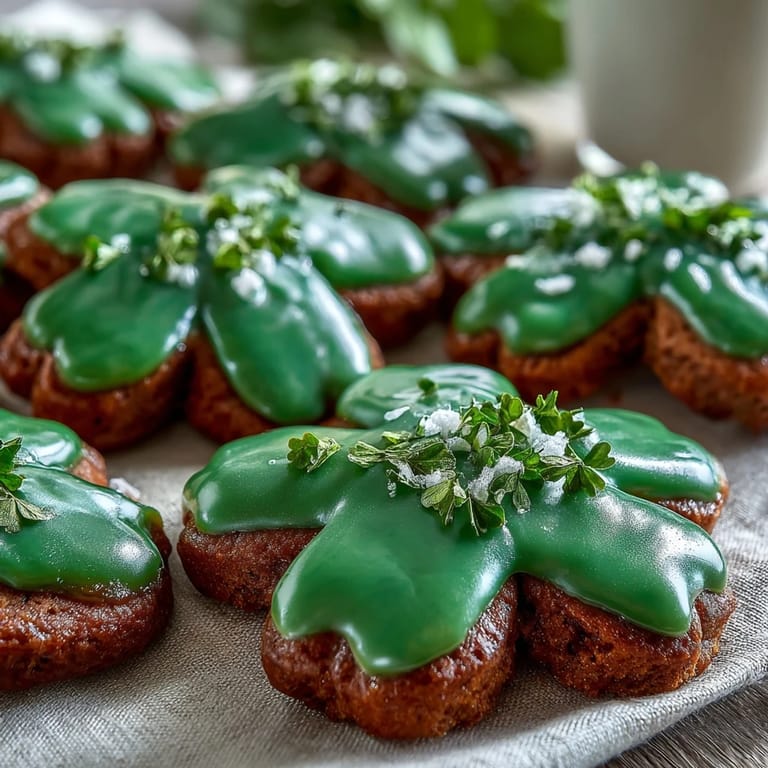
Save My kitchen smelled like butter and vanilla the morning my daughter announced she'd volunteered us to bring homemade cookies to her school's St. Patrick's Day celebration. I wasn't prepared, but the shamrock cutter she pulled from the drawer sparked something, and by noon we were elbow-deep in dough. These cookies became our tradition that year, and now every March, I mix this exact batch while she decorates them with green icing, humming off-key versions of Irish folk songs.
I'll never forget watching my neighbor's face when she opened the box of cookies we'd packaged in tissue paper. She held one up to the light like it was stained glass, and suddenly these weren't just cookies anymore—they were proof that something beautiful could come from an ordinary Tuesday afternoon. That's when I understood these shamrocks were really about the love you layer into them.
Ingredients
- Unsalted butter (1 cup, softened): This is your foundation, and softening it properly means the difference between dense cookies and ones that practically melt on your tongue. I learned the hard way that leaving it on the counter for 30 minutes beats the microwave.
- Granulated sugar (1 cup): Creaming it with butter aerates the dough, giving your cookies that tender crumb you're after.
- Large egg (1): This binds everything together and gives the cookies structure without making them cake-like.
- Pure vanilla extract (1½ teaspoons): The backbone of flavor here, so don't skimp on quality.
- Almond extract (½ teaspoon, optional): This adds depth and a hint of sophistication, but it's truly optional—some years I skip it entirely.
- All-purpose flour (2¾ cups): Measure by weight if you can, or spoon and level to avoid packing the cup.
- Baking powder (½ teaspoon): Just enough lift to keep cookies tender without making them spread wildly in the oven.
- Salt (½ teaspoon): This amplifies every other flavor, making the butter and vanilla sing.
- Powdered sugar (3 cups, sifted): Sifting removes lumps and makes icing smooth and gorgeous.
- Meringue powder (2 tablespoons): This stabilizes the icing and makes it harden properly, giving you that professional finish.
- Warm water (4–5 tablespoons): Add it gradually—royal icing consistency is all about patience and getting it just right for piping.
- Green gel food coloring: Gel holds its color better than liquid, and a little goes a long way, so start with just a tiny drop.
Tired of Takeout? 🥡
Get 10 meals you can make faster than delivery arrives. Seriously.
One email. No spam. Unsubscribe anytime.
Instructions
- Cream the butter and sugar until fluffy:
- Beat them together for 2 to 3 minutes until the mixture goes from pale yellow to a lighter, almost cloud-like texture. This is where air gets incorporated, making your cookies tender. You'll hear the electric mixer's pitch change—that's your signal you're almost there.
- Incorporate the egg and extracts:
- Add the egg, vanilla, and almond extract (if using) and beat until the mixture looks smooth and combined. Don't worry if it looks slightly separated at first—keep mixing.
- Combine dry ingredients separately:
- Whisk flour, baking powder, and salt together in a separate bowl to distribute the leavening evenly. This prevents pockets of baking powder in your cookies.
- Bring the dough together gently:
- Add the dry ingredients to the wet mixture and mix on low speed just until you don't see streaks of flour anymore. Overworking develops gluten, which makes cookies tough rather than tender.
- Chill the dough:
- Divide dough in half, flatten each into a disc, wrap tightly in plastic wrap, and refrigerate for at least 1 hour. Cold dough is easier to roll and cut without sticking.
- Preheat and prepare for baking:
- Set your oven to 350°F and line two baking sheets with parchment paper. The parchment prevents sticking and helps cookies bake evenly.
- Roll and cut shamrocks:
- On a lightly floured surface, roll one dough disc to ¼-inch thickness and cut out shamrock shapes with your cutter. Space cookies about 1 inch apart on the prepared sheets because they'll spread slightly.
- Bake until edges turn golden:
- Bake for 8 to 10 minutes—you want the edges just barely golden while the centers still look slightly underbaked. They'll continue cooking on the hot pan as they cool.
- Cool gradually:
- Leave cookies on the baking sheet for 5 minutes to set, then transfer them to a cooling rack. This prevents them from breaking and allows air circulation underneath.
- Make the royal icing:
- Combine powdered sugar, meringue powder, and vanilla extract in a bowl. Add warm water one tablespoon at a time, beating on low speed until you reach stiff peaks that hold their shape but are still pipeable.
- Tint with color:
- Add green gel food coloring one tiny drop at a time, stirring until you reach your desired shade. Gel colors are concentrated, so restraint here saves you from overly bright cookies.
- Decorate with piping:
- Transfer icing to a piping bag with a small round tip, outline each cookie first, then flood the interior with thinned icing if you want a smooth finish. Add details or sprinkles while the icing is still wet.
- Let icing set completely:
- Allow decorated cookies to dry for several hours or overnight before stacking or packaging them. This ensures the icing hardens properly and won't smudge.
 Save
Save There's something almost meditative about piping icing onto shamrocks while listening to rain against the windows and knowing these cookies will make someone smile. That quiet moment—when the kitchen is yours and the work is simple—that's when I realized why I keep coming back to this recipe year after year.
The Secret to Tender Cookies
The difference between cookies that crumble in your mouth and ones that feel like eating dough comes down to three things: not overworking the dough, not overbaking, and chilling properly. I've learned that softened butter at room temperature is different from warm butter—one creates a tender crumb, the other spreads into thin wafers. The chilling step feels like it's slowing you down, but it's actually giving you cookies worth the wait.
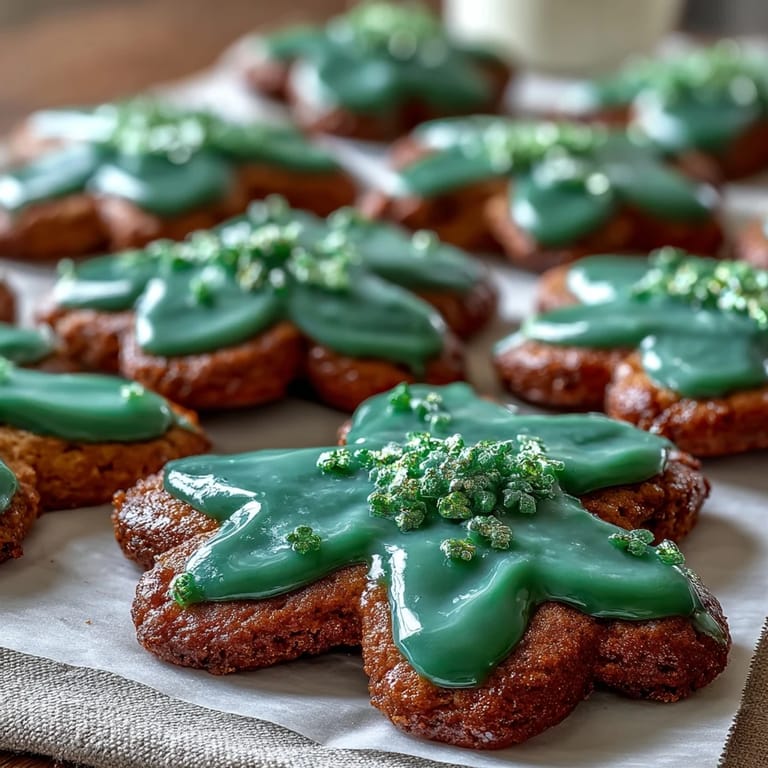
Decorating Like You Mean It
Piping royal icing looks intimidating until you realize it's really just controlled drizzling with purpose. Start with outlining the shamrock in a thin line, let it set for a minute, then flood the interior with slightly thinner icing for a smooth finish. Some people add sprinkles or shimmer dust while the icing is still wet—that's when the magic happens and a simple sugar cookie becomes something that feels a little bit Irish.
Storage and Gifting Ideas
These cookies stay fresh in an airtight container for up to five days, though they rarely last that long in my house. The royal icing hardens to a protective shell, making them perfect for layering in boxes with parchment paper between each cookie when you're gifting. I've also made batches specifically for cookie exchanges, and they travel beautifully.
- Stack cookies back-to-back with parchment between them to prevent icing from sticking.
- A flat box lined with tissue paper feels more special than plastic wrap, and your friends will notice the extra care.
- Include a little note with the baking date so everyone knows these are fresh and made with love.
 Save
Save These shamrock cookies are more than just sugar and butter—they're an excuse to slow down and make something that brings joy to people you care about. Whether you're baking for a celebration or just because March feels like it needs a little Irish luck, this recipe delivers.
Recipe FAQs
- → What gives the icing its vibrant green color?
The green color comes from gel food coloring added to the royal icing mixture for a bright, festive finish.
- → How can I make the cookies softer?
To keep cookies soft, avoid overbaking and remove them from the oven as soon as the edges start to turn golden.
- → Can I substitute the almond extract?
Yes, lemon or orange zest can be used instead of almond extract for a fresh citrus twist.
- → What tools do I need for decorating the cookies?
Essential tools include a piping bag with a small round tip, mixing bowls, and a shamrock-shaped cookie cutter.
- → How long does it take for the icing to dry?
The royal icing dries hard and typically requires several hours at room temperature to fully set.