 Save
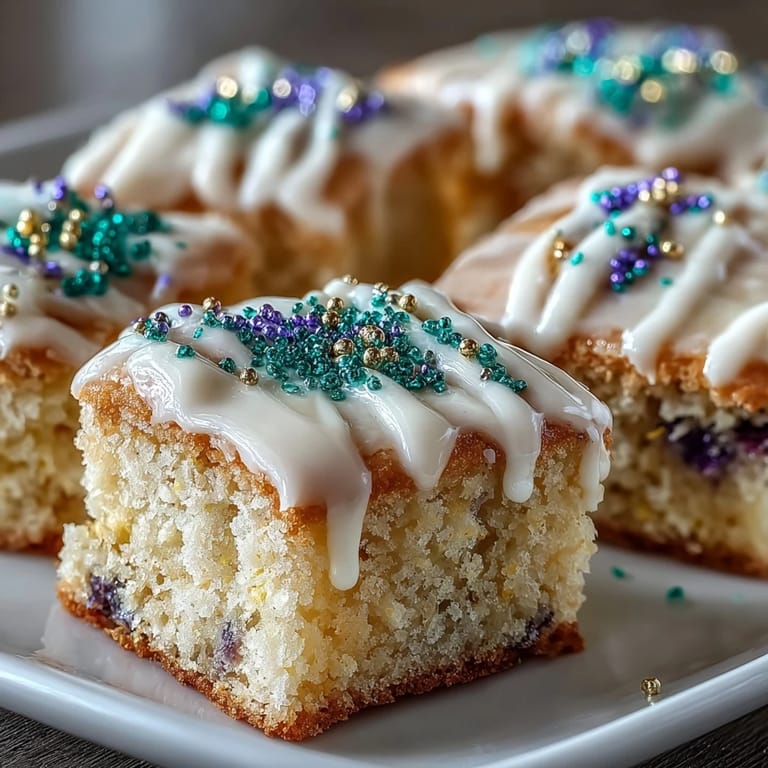
Save My cousin texted me a photo of King Cake at 11 PM on Mardi Gras Eve, asking if I could whip up something festive for her party the next morning. I'd never made King Cake before, but I had flour, butter, and a wild idea to transform it into bars instead of the traditional ring. By midnight, I was mixing dough in my kitchen, the smell of butter and lemon zest filling the house, and I realized this might actually work. The result was something that felt both reverent to tradition and playfully my own.
I brought the first batch to a small Mardi Gras gathering where nobody knew each other, and watching people's faces light up when they bit through the crunchy icing into the tender cookie was something I didn't expect. Someone asked for the recipe before they'd even finished their first bar, and that's when I knew I'd stumbled onto something worth repeating.
Ingredients
- Unsalted butter, softened (1 cup): Start with room temperature butter so it creams smoothly with sugar without any lumps hiding in the dough.
- Granulated sugar (1 1/4 cups): This is what gives the cookies their tender crumb and slight sparkle when baked.
- Large eggs (2): Add them one at a time so the mixture stays emulsified and the dough stays light and fluffy.
- Vanilla extract (2 teaspoons): Use real vanilla if you can; the flavor difference shows up in every bite.
- Almond extract (1/2 teaspoon, optional): This echoes the traditional King Cake flavor and adds a subtle warmth that lemon alone can't do.
- All-purpose flour (2 1/2 cups): Measure by scooping and leveling to avoid packing too much flour into the dough.
- Baking powder (1/2 teaspoon): This helps the bars rise slightly so they're tender rather than dense.
- Salt (1/2 teaspoon): Even a pinch makes all the other flavors sing louder.
- Ground cinnamon (1/4 teaspoon): Cinnamon connects these bars to the warm spice profile of a real King Cake.
- Lemon zest (from 1 lemon): Use a microplane to get fine, bright zest that distributes evenly through the dough.
- Powdered sugar (2 cups): Sift it if it's lumpy so your icing stays smooth and glossy.
- Milk (2-3 tablespoons): Start with 2 tablespoons and add more if you want thinner icing for spreading.
- Purple, green, and gold sanding sugar: Sanding sugar stays crunchy longer than regular sprinkles, which keeps the texture interesting all the way through.
Tired of Takeout? 🥡
Get 10 meals you can make faster than delivery arrives. Seriously.
One email. No spam. Unsubscribe anytime.
Instructions
- Prepare your pan and heat your oven:
- Line a 9x13-inch pan with parchment paper, leaving overhang on two sides so you can lift the whole thing out later. Preheat to 350°F while you work on the dough.
- Cream butter and sugar:
- Beat them together for 2 to 3 minutes until the mixture is pale and fluffy, which means air is incorporated and your cookies will be tender. You should be able to see ribbons forming when you lift the beaters.
- Add eggs and extracts:
- Drop in the first egg, beat it fully, then add the second. Pour in vanilla, almond extract if using, and lemon zest, then mix until everything is pale and well combined.
- Combine dry ingredients in a separate bowl:
- Whisk flour, baking powder, salt, and cinnamon together so the baking powder distributes evenly through the flour.
- Fold dry into wet:
- Add the flour mixture to the eggs and butter, mixing just until you see no white streaks of flour anymore. Overmixing at this point makes the cookies tough.
- Spread dough into the pan:
- Use a spatula to press the dough into an even layer, working from the center outward. Wet hands make this easier if the dough sticks.
- Bake until set:
- 22 to 25 minutes is the sweet spot—the edges should be lightly golden and the center should feel set when you gently press it. The cookies continue cooking slightly as they cool, so don't wait for them to be dark.
- Cool completely before icing:
- This takes about 30 minutes to an hour on a wire rack. If you ice while the cookies are warm, the icing will melt into rivers.
- Make the icing:
- Whisk powdered sugar, milk, and vanilla until smooth and pourable—you want it to spread easily but stay in place once you've decorated.
- Spread icing and add color:
- Pour the icing over the cooled cookies and spread it to the edges. Immediately sprinkle the purple, green, and gold sanding sugar in sections or whatever pattern makes you happy.
- Let icing set:
- Wait 30 minutes before slicing so the icing firms up and doesn't stick to your knife.
- Slice into bars:
- A sharp knife dipped in hot water and wiped clean between cuts keeps the lines clean and neat.
 Save
Save There's something about festive food that makes ordinary moments feel ceremonial. I watched someone at that Mardi Gras party hand these bars to a friend they'd just met, and the bars became a reason to linger and talk longer than they might have otherwise.
The King Cake Flavor Story
Traditional King Cake has this distinctive flavor that's warm, slightly sweet, and a little mysterious—cinnamon, nutmeg, sometimes orange or almond extract. Converting that into a bar cookie meant keeping the spice backbone but letting the lemon zest take center stage, which is a brighter take than the original. The bars don't taste exactly like King Cake, but they taste like what King Cake made me feel.
Why Bars Instead of a Ring
A whole King Cake is beautiful but intimidating to make, and it requires a special pan. Bars are forgiving and shareable without requiring a knife and plate, which means people grab one, chat, and keep moving—perfect for parties. You also get crispy edges on more of the pieces, which honestly is the best part of any baked good anyway.
Making These Your Own
The skeleton of this recipe is flexible enough to take whatever flavors you're drawn to. Some people swap lemon for orange zest, some add a pinch of nutmeg or even cardamom, and the sprinkle colors don't have to be Mardi Gras purple, green, and gold—they can be whatever your celebration calls for.
- If you're short on time, you can make the dough the day before and bake it in the morning without losing anything in flavor.
- These bars actually taste better on day two because the flavors settle and mellow slightly, so make them ahead guilt-free.
- Store them in an airtight container at room temperature, and they'll stay fresh for two full days.
 Save
Save These bars have become my shorthand for showing up to celebrations feeling ready and thoughtful, without spending hours in the kitchen. Make them once, and they'll become your shorthand too.
Recipe FAQs
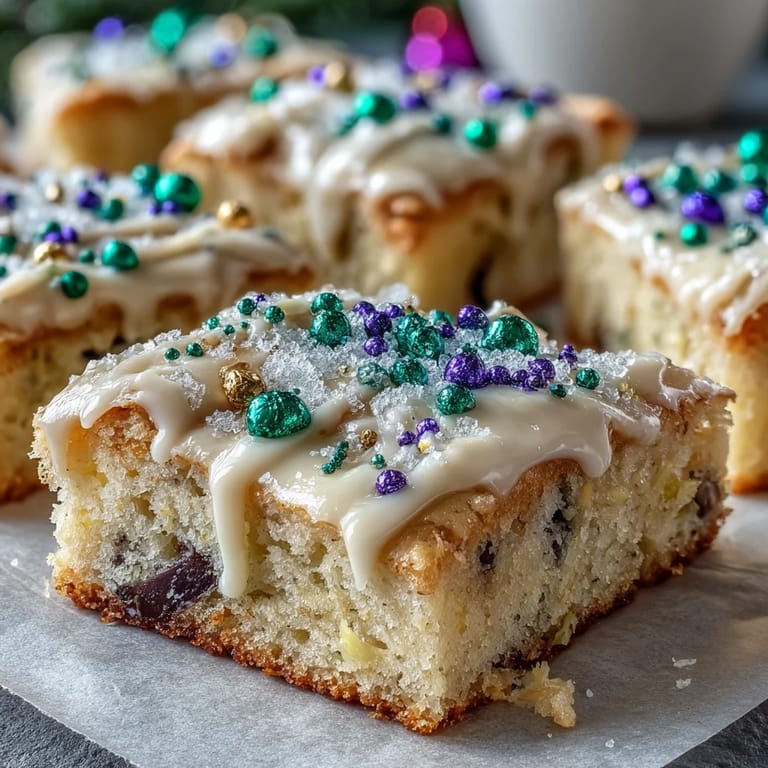
- → What gives the bars their festive colors?
The vibrant colors come from purple, green, and gold sanding sugars or sprinkles, applied over the icing in decorative patterns.
- → Can I substitute ingredients for dietary needs?
You can replace almond extract with extra vanilla or omit it for allergies. Using dairy-free alternatives may require recipe adjustments.
- → How do I prevent the bars from overbaking?
Watch for lightly golden edges and a set center. Baking for 22–25 minutes and checking early helps keep the bars tender.
- → What is the role of lemon zest in the base?
Lemon zest adds a fresh, bright note that balances sweetness and enhances the overall flavor complexity.
- → Can these bars be prepared in advance?
Yes, they can be made 1–2 days ahead and stored in an airtight container to keep freshness and flavor intact.