Save
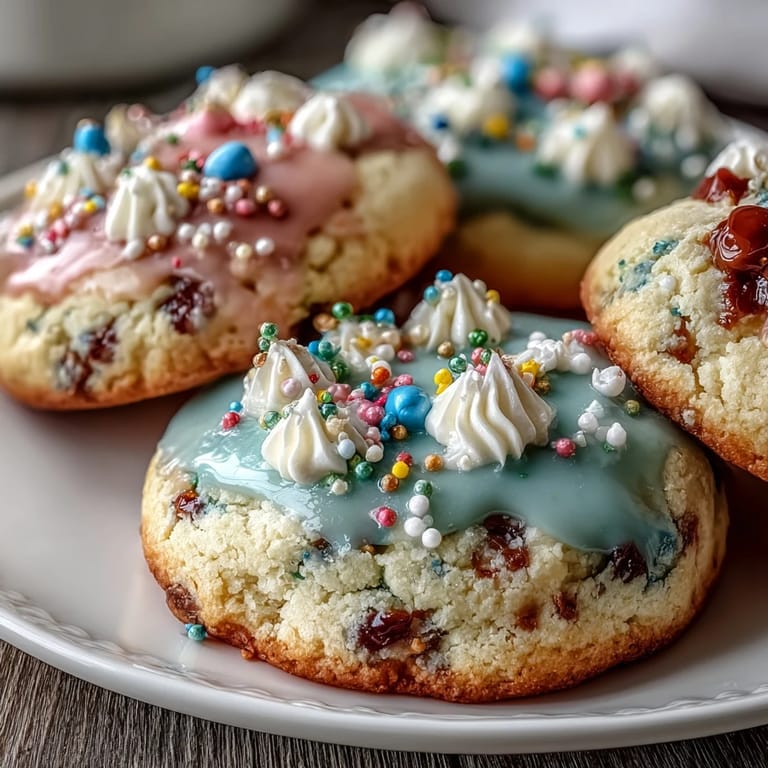
Save My kitchen smelled like butter and vanilla last spring when my niece asked if we could make Easter cookies together, and I realized I'd been using the same tired sugar cookie recipe for years without really thinking about it. That afternoon, as flour dusted her nose and she giggled at the bunny-shaped cutters, I understood why these simple buttery rounds had become the tradition—they're just tender enough to melt on your tongue, sturdy enough to hold elaborate decorations, and forgiving enough that even a child's clumsy hands produce something beautiful. The pastel icing transformed our afternoon into an art project, and by the time we finished, every cookie told a story in soft pinks, yellows, and lavenders.
I'll never forget the Easter morning when my mother-in-law arrived with three dozen store-bought cookies, took one look at our homemade spread, and immediately asked for the recipe—something she'd never done before. That simple gesture made me realize these weren't just treats; they were the cookies people actually wanted to remember, the ones that made the table feel personal and intentional.
Ingredients
- All-purpose flour (2 1/2 cups): The backbone of tender cookies; don't sift before measuring or you'll end up with a dense, tough dough.
- Baking powder (1/2 teaspoon): Just enough lift to keep these cookies tender without making them cake-like or puffy.
- Salt (1/4 teaspoon): This tiny amount wakes up the vanilla and butter flavors in ways you won't consciously taste but absolutely will miss if you forget it.
- Unsalted butter (3/4 cup, softened): Room temperature butter creams properly with sugar; cold butter will leave you with a lumpy, difficult dough.
- Granulated sugar (1 cup): The standard choice here keeps cookies tender rather than crispy; don't substitute brown sugar unless you want chewier results.
- Egg (1 large): Brings structure and richness without overdrying the cookies if you don't overbake them.
- Pure vanilla extract (2 teaspoons): Use the real thing; imitation flavoring tastes flat against the butter and sugar.
- Milk (1 tablespoon): Just enough moisture to bring the dough together without making it sticky or greasy.
- Powdered sugar (3 cups, sifted): For the icing, sifting removes lumps that would show as grainy streaks in your finished decoration.
- Meringue powder (2 tablespoons): This stabilizes the icing and helps it set firm enough for decorating without turning brittle like regular royal icing sometimes does.
- Warm water (5–6 tablespoons): Start with less and add gradually; thick icing is harder to thin than thin icing is to thicken.
- Gel food coloring (pastel shades): Gel colors don't thin your icing the way liquid colors do, and pastels won't turn muddy or require extra sugar to achieve soft hues.
Tired of Takeout? 🥡
Get 10 meals you can make faster than delivery arrives. Seriously.
One email. No spam. Unsubscribe anytime.
Instructions
- Combine the dry ingredients:
- Whisk flour, baking powder, and salt together in a medium bowl; this distributes the leavening evenly so you won't get pockets of dense cookie mixed with light cookie. Setting it aside keeps you from adding it in chunks later.
- Cream butter and sugar until fluffy:
- Beat them together for a full 2–3 minutes until the mixture looks pale and airy, almost like frosting; this incorporates air that keeps cookies tender. You'll know it's ready when you can see a noticeable color change and the texture looks creamy rather than gritty.
- Incorporate the egg and vanilla:
- Mix these in thoroughly until there are no streaks of egg white visible; this ensures even moisture distribution. The batter should look smooth and slightly glossy at this point.
- Add dry ingredients gently:
- Fold in the flour mixture on low speed, stopping as soon as no white streaks remain; overmixing develops gluten and makes cookies tough and chewy. The dough should come together softly without being sticky.
- Add milk for final moisture:
- This last tablespoon brings everything together without overworking the dough, ensuring tender cookies that hold their shape. Stir just until combined.
- Chill the dough:
- Divide into two discs, wrap in plastic, and refrigerate at least 1 hour (or up to 24 hours); cold dough rolls easier and bakes more evenly. The butter firms up, preventing cookies from spreading too thin.
- Preheat and prepare:
- Set your oven to 350°F (175°C) and line baking sheets with parchment paper; this prevents sticking and allows even heat circulation underneath. Cold dough should go straight onto cold parchment for best results.
- Roll and cut shapes:
- On a lightly floured surface, roll dough to exactly 1/4-inch thickness for consistent baking; too thin and they'll crisp up, too thick and centers stay soft. Cut your Easter shapes and place them 1 inch apart on the prepared sheets so heat circulates evenly.
- Bake until edges just turn golden:
- Watch carefully during the last 2 minutes of baking; cookies continue cooking on the sheet as they cool, so pull them out when edges are barely golden and centers still look barely set. This is the secret to soft cookies that don't harden further.
- Cool properly:
- Leave cookies on the baking sheet for 5 minutes so they set slightly, then transfer to wire racks to cool completely; this prevents them from breaking apart when you move them. Warm cookies are fragile, so patience here matters.
- Make the royal icing:
- Combine powdered sugar and meringue powder, then add water gradually while beating on low speed until the mixture looks smooth; switch to high speed and beat 3–4 minutes until stiff peaks form, which means the icing will hold its shape for decorating. This is when you know it's ready.
- Tint with pastel colors:
- Divide icing among small bowls and add gel food coloring one tiny drop at a time, stirring well between additions; gel colors are concentrated, so you need less than you'd think. Pastel shades need just a hint of color mixed into white icing.
- Decorate and set:
- Transfer icing to piping bags and decorate cooled cookies with lines, dots, or whatever design strikes you; let the icing dry completely (usually 2–4 hours) before stacking or serving. Patience during this final step keeps your designs perfect.
 Save
Save There's a quiet moment I treasure from that Easter afternoon when my niece looked at the finished cookies laid out on the counter, each one unique and imperfect in the best way, and she simply said, 'These are almost too pretty to eat.' We ate them anyway, of course, but not before she'd arranged them in a perfect pattern on a plate, treating them like the edible art they'd become.
The Science Behind Tender Cookies
Sugar cookies can be temperamental if you don't understand what makes them tender versus tough, and I've baked enough batches to see the difference clearly now. Creaming the butter and sugar thoroughly incorporates air that leavens the cookies gently, while adding milk at the end provides just enough moisture to keep the crumb tender without encouraging gluten development. The balance feels delicate until you've done it once, then it becomes second nature.
Decorating with Royal Icing
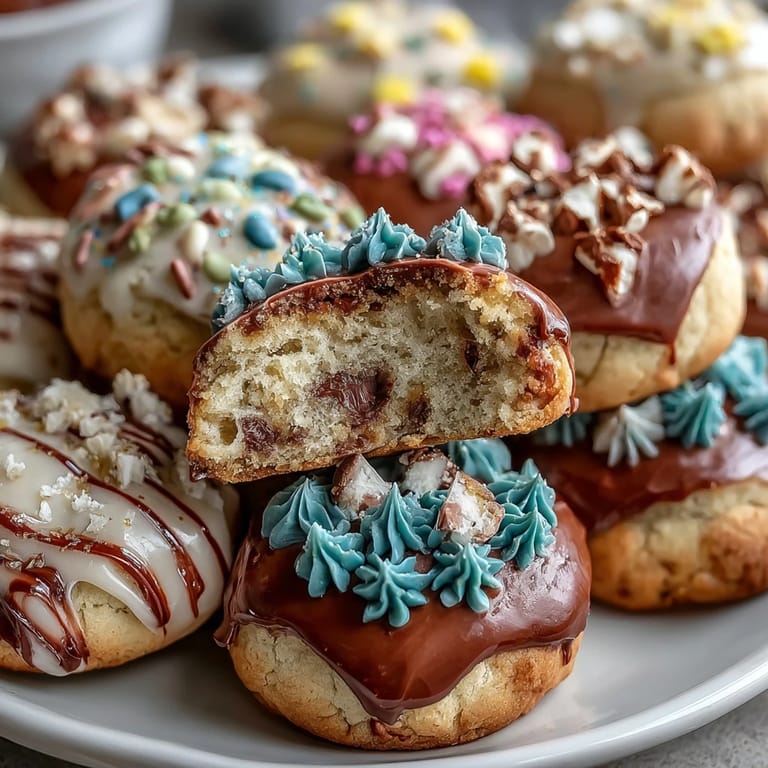
Royal icing intimidated me at first because it seemed so precise and unforgiving, but meringue powder changes everything by making the process actually enjoyable. The icing holds its shape, dries reliably, and looks glossy rather than chalky, and you can thin it with a few drops of water if you want to do a flooding technique where you pipe an outline then fill it in with thinner icing. Once you understand the consistency you want—stiff for piping lines, thinner for flooding—decorating becomes less about technical skill and more about having fun with color and pattern.
Storage and Flavor Variations
These cookies keep beautifully in an airtight container for a full week, which means you can actually bake them a few days before serving without stress or last-minute scrambling. I've experimented with lemon extract and almond extract in place of vanilla, and both work wonderfully if you want a subtle flavor shift—lemon pairs particularly well with white icing, while almond feels more elegant and spring-like. The basic recipe is flexible enough to make your own without feeling like you're breaking something sacred.
- Store cookies and icing separately if you want to decorate fresh each time, or decorate everything first and let icing set hard before stacking.
- Pair these with Earl Grey tea for an afternoon that feels intentionally elegant without being fussy.
- Don't stress about perfect symmetry or precision in your decorating; imperfect looks homemade in the best possible way.
 Save
Save These cookies are the kind that make spring feel like it deserves a celebration, and they taste even better when you've made them with your own hands. Bake them, decorate them, share them, and watch how they become the cookies people ask for year after year.
Recipe FAQs
- → How do I achieve tender sugar cookies?
Chilling the dough before baking and avoiding over-baking help keep cookies soft and tender.
- → What makes royal icing pastel in color?
Gel food colorings in soft shades like pink, blue, green, purple, and yellow create the vibrant pastel icing.
- → Can I add flavor variations to the cookies or icing?
Yes, adding lemon or almond extract to the dough or icing enhances flavor complexity.
- → How should decorated cookies be stored?
Keep them in an airtight container at room temperature for up to one week to maintain freshness and icing texture.
- → What tools ensure precise decoration?
Using piping bags or squeeze bottles allows detailed control when applying royal icing decorations.
- → Why use meringue powder in the icing?
Meringue powder helps achieve stiff peaks and a smooth, durable texture that hardens nicely on cookies.