 Save
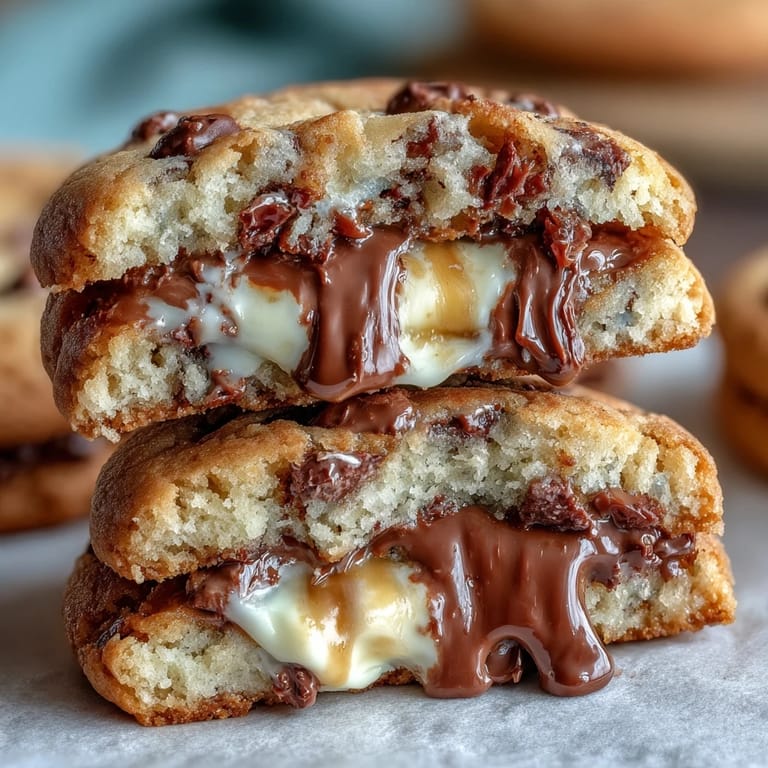
Save My sister called me in a panic the week before Easter, convinced she'd ruined her holiday baking plans by forgetting to buy actual Easter candy. Instead of commiserating, I found myself pulling a half-melted Cadbury Creme Egg from her freezer and thinking: what if this wasn't a problem at all, but an opportunity? That afternoon, we ended up creating these cookies together, watching the gooey centers ooze out during the first test batch and laughing at the delightful mess we'd made. What started as salvaging a baking disaster turned into something we now make year-round.
I brought a batch to my coworker's desk on a random Wednesday in November, long past Easter season, and watched her face go through genuine surprise when she bit into one. She'd been expecting a normal cookie, and the burst of creme filling made her do a double-take that I'll never forget. That moment solidified it for me: these aren't just novelty cookies for the holidays, they're something special enough to make people smile any time of year.
Ingredients
- Unsalted butter (1 cup, softened): The foundation of everything tender in this cookie; letting it come to room temperature first means it'll cream properly with the sugars, trapping air that keeps the cookies chewy.
- Brown sugar (1 cup, packed) and granulated sugar (½ cup): The brown sugar brings molasses depth and moisture, while the white sugar helps with spread and crispness at the edges, creating that perfect textural contrast.
- Eggs (2 large) and vanilla extract (2 teaspoons): Eggs bind everything together and add richness; vanilla rounds out the flavor so the Cadbury egg becomes the star rather than fighting for attention.
- All-purpose flour (3 cups), baking soda (1 teaspoon), and salt (½ teaspoon): The baking soda is crucial here because it helps the cookies spread just enough to encase the egg filling while staying soft inside.
- Semisweet chocolate chips (1½ cups): They add pockets of chocolate without overwhelming the delicate balance between cookie and creamy center; don't skimp on quality.
- Mini Cadbury Creme Eggs (12, unwrapped and chilled): The whole point of the exercise, so buy decent ones and keep them cold until the last moment, or they'll start leaking before the dough seals them in.
Tired of Takeout? 🥡
Get 10 meals you can make faster than delivery arrives. Seriously.
One email. No spam. Unsubscribe anytime.
Instructions
- Prepare your workspace:
- Preheat your oven to 350°F and line two baking sheets with parchment paper so nothing sticks. This small step prevents the scramble later.
- Cream the butter and sugars:
- Beat softened butter with both sugars for 2-3 minutes until the mixture looks pale and fluffy, like clouds. This aerates the dough, which is what keeps these cookies tender rather than dense.
- Incorporate eggs and vanilla:
- Add eggs one at a time, beating well after each one, then splash in the vanilla and mix until combined. The mixture should look silky and well-blended at this point.
- Combine dry ingredients separately:
- In another bowl, whisk together flour, baking soda, and salt so the leavening is evenly distributed. This prevents pockets of baking soda taste that would taste metallic and unpleasant.
- Merge wet and dry:
- Add the dry mixture to the wet ingredients gradually while mixing on low speed, just until combined. Overmixing develops gluten and makes cookies tough, so stop as soon as you don't see streaks of flour.
- Fold in chocolate chips:
- Use a rubber spatula to gently fold in the chocolate chips by hand. Hand-folding is gentler than continued mixing and keeps the dough tender.
- Prepare the egg pockets:
- Scoop about 2 tablespoons of dough and press it into a flat disk in your palm. Place a cold Cadbury egg in the center, then gather the dough around it and seal the edges completely, making sure no chocolate peeks through or it'll leak.
- Space and bake:
- Arrange stuffed dough balls on your baking sheets 2 inches apart and bake for 12-14 minutes until the edges turn golden brown but the centers still look slightly underbaked. They'll continue cooking on the hot sheet after you pull them out.
- Cool strategically:
- Let the cookies rest on the baking sheet for 5 minutes so the center firms up just enough to move, then transfer to a wire rack. If you move them too soon, they'll fall apart; if you wait too long, they'll be overdone.
 Save
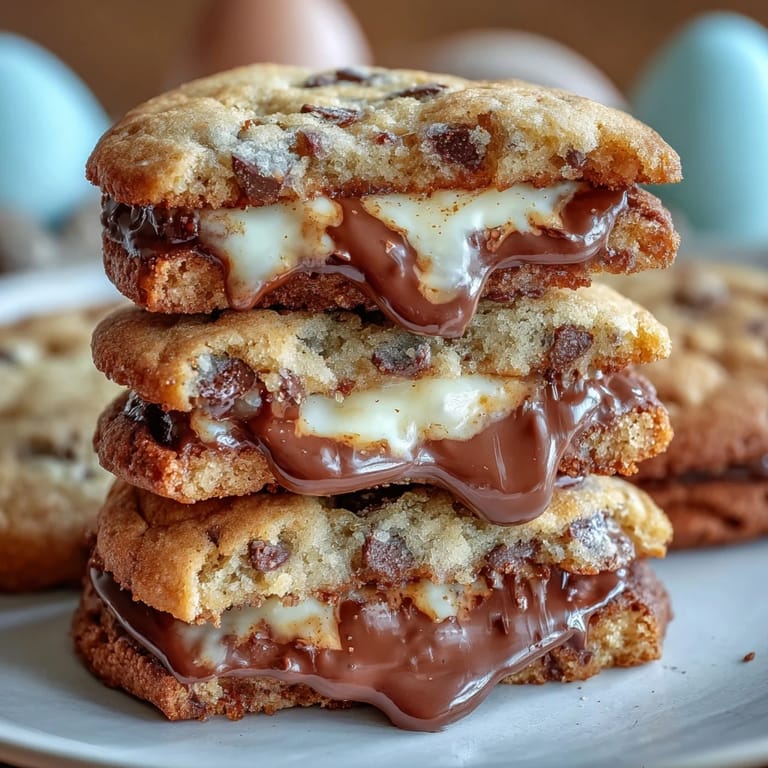
Save There's something almost ritualistic about the moment you bite into one of these warm and watching the golden yolk-colored filling spill out across your tongue. My mom took one bite of a still-warm cookie, closed her eyes, and said, "This is what Easter should taste like," and honestly, she was right. That's when I knew these weren't just clever cookies, they were something worth repeating.
The Secret to Perfect Texture
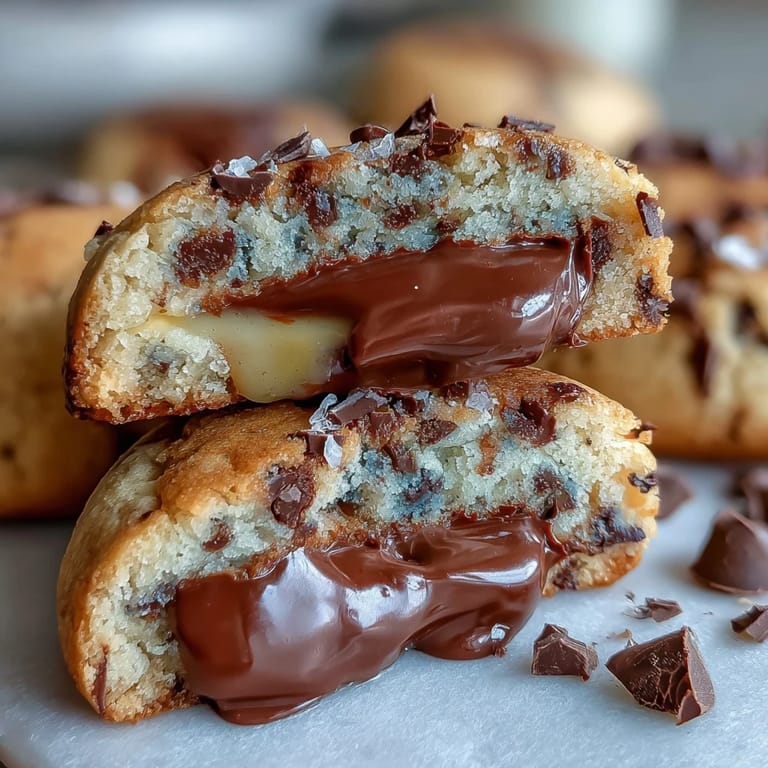
The real magic happens in the balance between underbaking and letting the center firm up slightly after pulling from the oven. I learned this through trial and error, and it changed everything: if you bake them until they look fully set, the Cadbury center hardens into a dense chocolate disc rather than that perfect molten ooze. The cookies should look like they need another minute or two when you pull them out, and that's exactly when they're done.
Customization Without Losing the Plot
While the classic combination of semisweet chocolate chips and Cadbury Creme Eggs is genuinely perfect, I've experimented with milk chocolate chips for a sweeter profile and dark chocolate chips for an more sophisticated edge. The egg itself is where the magic lives, though, so rather than swapping that out entirely, I've played with other cream-filled chocolate brands when I can find them, or occasionally pressed a small amount of caramel into the center as a twist. Each variation teaches you something about balance and why the original works so well.
Baking Timing and Temperature Matter More Than You'd Think
Every oven runs differently, and this recipe is sensitive enough that you really need to watch the cookies rather than just trust the time. The first batch in any oven requires attention and observation, checking them around the 11-minute mark to see how they're browning on the edges and how the centers look. Once you dial in your specific oven, subsequent batches become second nature, but that first test batch is your learning moment.
- Set a timer for 11 minutes and check then, even if the recipe says 12-14, because your oven might run hotter than mine.
- Look for golden brown edges while the centers still look slightly matte and soft, which signals they're perfectly done.
- If you're serving these warm, pull them out a hair earlier; if you're storing them, bake an extra minute or so for more structure.
 Save
Save These cookies have become my go-to gift when I want to impress someone without spending all day in the kitchen, and they never fail to delight. Make a batch this week and watch what happens when someone bites into the surprise center.